You can do it with CPUs, GPUs, etc. Interestingly, you can even overclock your monitor for gaming. By overclocking the monitor, you increase its refresh rate which means better performance while gaming. In this article, we will show you how to overclock monitors for gaming using some simple steps and methods. Also, Read: How to Undervolt CPU Using These 2 Methods
How to Overclock Monitor For Gaming: Risks and Benefits
Are There Any Risks?
Let’s just discuss the risks that might involve in overclocking because there aren’t many. You see, there is very little chance that overclocking will damage any hardware of your monitor. However, overclocking might terminate the warranty of your monitor as brands don’t encourage it. So just check before you do it, if your monitor is in warranty, it is just better if you don’t overclock it. Also, note that the only risk is to the lifespan of your monitor. Overclocking a monitor basically means increasing its refresh rate from the standard rate in which it came from the factory. Overclocking increases the performance on the expanse of other things so the hardware of your monitor will have to work more extensively to generate a higher refresh rate. This means that the internals will wear out more quickly compared to normal.
Benefits of Overclocking
Well, you get a higher screen refresh rate when you overclock your monitor. It means that your monitor will perform better while gaming.
What’s a Refresh Rate Anyways?
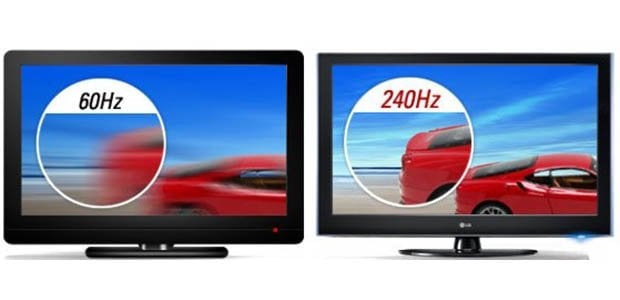
Refresh Rate is the number of times the monitor refreshes an image per second. So when you move around the game, the image just constantly changes. For the optimal gaming experience, your laptop should keep up with the changing image. Otherwise, you will see screen flickering which is not at all good. The bottom line is that a higher refresh rate means better and snappy performance from the monitor. The standard refresh rate for monitors these days is 60Hz but if you play some heavy games, you might want a little more than that. That is when you would want to overclock your monitor. Also, Read: Top 5 Best 144 Hz Monitors You Can Buy Right Now
Overclock Your Monitor
Depending on which graphics card you use, the steps might be a little different. So let’s start with the NVIDIA Graphics first.
NVIDIA Users
Step 1: First of right-click on your Desktop and then click on the NVIDIA Control Panel. Step 2: From the menu on the left, click on Change resolution under Display. Step 3: Scroll down and select the Customise box underneath Resolution. Step 4: Check the “Enable Resolutions Not Exposed by the Display” and then click on Create Custom Resolution. Here, you can select a refresh rate of your liking and test it. If you don’t like it, you can change it. The most ideal thing to do is just increase the refresh rate by 5Hz and check if it suits and works. Normally, you can only increase the refresh rate by 15Hz even with overclocking. Also, Read: AMD Ryzen vs Intel CPUs: Which One is Better in 2021?
AMD Users
Step 1: Open AMD Radeon Settings by right-clicking on your Desktop. Step 2: Now open the Display tab. Step 3: Now you shall see Custom resolutions and click on Create next to it. Step 4: Again here you can select your desired refresh rate and then click on Save. Once you are done, restart your computer and the new settings should be effective.
Intel Users
Step 1: Open Intel Graphics Command Center from the Windows Search Bar. Step 2: Click on Display. Step 3: Here click on Custom Resolutions. Step 4: Enter the resolution and your desired refresh rate and then click on Add. Again here try increasing the refresh rate by 5Hz. If you are successful, just restart your computer. Otherwise, you will be taken back to the previous screen. Also, Read: Motherboard Buying Guide: All You Need to Know
Using CRU- Custom Resolution Utility
CRU is a great tool that can help you overclock your monitor for gaming. Here is how to do it: Step 1: Download and install CRU on your computer. Step 2: Launch CRU. Click on the Detailed Resolutions box. Step 3: Click on Add. Step 4: From the drop-down menu set the Timing to LCD Standard. Step 5: Now change the refresh rate. Again start with the increment of 5Hz. Click on OK and restart your computer. Just one more thing you need to do. When the computer restarts, right-click on the Desktop and click on Display settings. Scroll down and click on Advanced display settings. Click on Display adapter properties. Go to the Monitor tab and change the refresh rate. After that, click on OK. That’s it!
Conclusion
So that was all about how to overclock your monitor for gaming. The thing is the overclocking totally depends on your monitor. Even if you have identical monitors, overclocking might work on one but won’t work on the other. Some gaming monitors support overclocking so you can try it on those. But overclocking will reduce the lifespan of your monitor so be advised. Also, Read: How To Overclock And Underclock Android Phone

